
Last Updated: June 2026 | Reading Time: 7 minutes
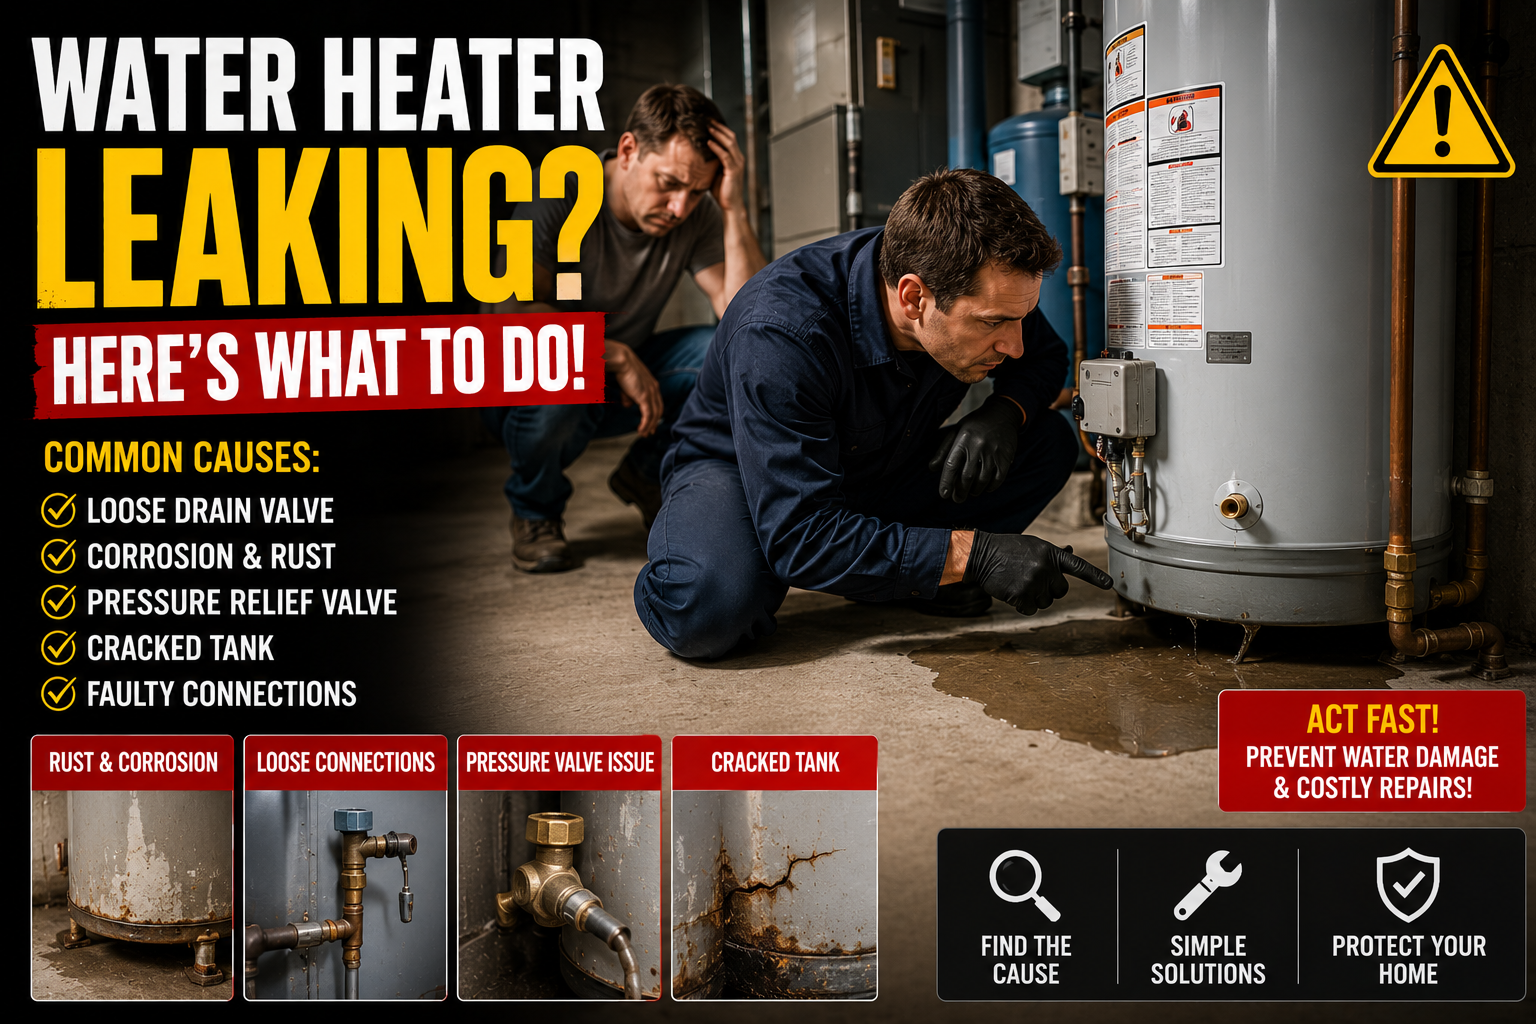
Is your water heater leaking from the bottom? A puddle of water under your water heater is one of the most urgent appliance problems you can face — especially because a bottom leak often means the tank itself has failed. However, not every bottom leak is a death sentence for your water heater. Some causes are completely fixable yourself at home.
In this guide, we’ll walk you through the 5 most common reasons your water heater is leaking from the bottom, show you how to diagnose each one, and tell you exactly when to repair and when to replace.
Act Fast — Do This Right Now
If you find water under your water heater:
- Do not ignore it — even a small leak can become a major flood within hours if a fitting fails completely
- Identify the source first — dry the bottom of the tank and surrounding floor completely, then watch closely
- Turn off the cold water supply — the valve on the cold water pipe entering the top of the tank
- For gas heaters: turn the gas control valve to PILOT
- For electric heaters: turn off the circuit breaker
- Place towels or a bucket to contain water while you diagnose
Quick Diagnosis: Where Exactly Is the Water Coming From?
This is the most important step. Before doing anything else, identify precisely where the water originates:
- From the drain valve at the bottom of the tank → loose or faulty drain valve — fixable
- From the T&P valve discharge pipe that runs down the side to the bottom → T&P valve issue — fixable
- From the tank body itself → internal corrosion — almost always means replacement
- From the bottom element gasket (electric heaters) → gasket failure — fixable
- Condensation pooling at the base → not a real leak — no fix needed
Dry everything completely and use a flashlight to trace the water back to its exact origin.
Cause 1: Leaking Drain Valve — Most Common Fixable Cause
The drain valve is a faucet-like fitting located near the very bottom of the tank. It is used to drain and flush the tank during maintenance. Over time, the valve can develop a slow drip from mineral buildup on the seat, a worn rubber seal, or simply from being bumped or turned slightly open.

Signs of a drain valve leak:
- Water drips directly from the valve spout — not from the tank wall
- The valve handle feels slightly loose or turned
- Mineral deposits or rust stains are visible around the valve
How to fix it:
If the valve is just slightly open:
- Turn the valve handle clockwise to close it completely
- Dry the area and wait 30 minutes to confirm the drip has stopped
If the valve seat is fouled with mineral deposits:
- Connect a garden hose to the valve
- Open the valve fully for 30 seconds to flush any debris from the seat
- Close firmly and check for dripping
If the valve continues to drip:
- The valve needs replacing — turn off cold water supply and drain the tank
- Unscrew the old drain valve using an adjustable wrench
- Wrap threads of new valve with PTFE tape and install ($10–$20 on Amazon)
- Restore water supply and check for leaks
Cost: $0–$20 | Time: 15–30 minutes
Pro Tip: Many water heater drain valves use a cheap plastic valve from the factory. When replacing, upgrade to a brass ball valve — it lasts far longer and provides a much more reliable seal.
Cause 2: T&P Valve Discharge Pipe Dripping at the Bottom
The temperature and pressure relief valve (T&P valve) is located on the side or top of the tank, but its discharge pipe runs down to near the floor. When the T&P valve releases water — either because it is faulty or because tank pressure is too high — water flows down this pipe and pools at the bottom of the heater, making it appear as though the tank itself is leaking from the bottom.

Signs the T&P valve is the source:
- Water is coming from the end of the discharge pipe at the floor — not from the tank body
- You can hear or see the T&P valve dripping at the top of the heater
- The water is very hot — T&P discharge water is scalding
How to fix it:
If the T&P valve is faulty and dripping constantly:
- Turn off cold water supply and set gas to PILOT or turn off the breaker
- Drain approximately 10 gallons from the tank
- Remove the discharge pipe and unscrew the old T&P valve with a pipe wrench
- Install a new T&P valve with PTFE tape on the threads ($15–$30 on Amazon — match the pressure and BTU rating)
- Reconnect the discharge pipe and restore heat and water supply
If the T&P valve is releasing due to high pressure: This is a more serious issue — do not simply replace the valve. High water pressure from the street can cause repeated T&P releases. Call a plumber to diagnose and install a pressure reducing valve if needed.
Cost: $15–$30 | Time: 30–45 minutes
Cause 3: Failed Bottom Heating Element Gasket — Electric Heaters Only
Electric water heaters have two heating elements — one near the top and one near the bottom of the tank. Each element passes through the tank wall and is sealed with a rubber gasket. Over time, the bottom element gasket can deteriorate and fail — causing water to leak from the element port at the bottom of the tank.

Signs of a failed element gasket:
- Water appears to seep from a bolt or fitting near the bottom of the tank — not from the tank seam
- The leak is specifically on an electric water heater
- You can see rust staining or mineral deposits around the element port
How to fix it:
- Turn off the electric breaker for the water heater
- Turn off the cold water supply
- Connect a garden hose to the drain valve and drain the tank completely
- Remove the access panel on the side of the tank and locate the bottom element
- Use a heating element wrench to unscrew the element
- Inspect the gasket — if cracked, flattened, or deteriorated, replace it
- Install a new element with a fresh gasket ($10–$20 on Amazon — match the wattage)
- Refill the tank completely before restoring power — never power a partially filled electric heater
Cost: $10–$20 | Time: 45–60 minutes
Cause 4: Condensation Pooling at the Base
In certain conditions — particularly when the water heater is new, in a cold environment, or when cold water enters a warm tank — condensation can form on the outside of the tank and drip to the floor, pooling at the base and appearing to be a leak from the bottom.

Signs that it is condensation:
- The “leak” appears as small droplets on the tank exterior rather than flowing water
- The problem is worst in the morning or after cold water fills the tank
- The water heater is brand new — condensation is very common during the first few weeks of operation
- The amount of water is small and the tank exterior feels cool and damp rather than wet
How to confirm it is condensation:
- Dry the tank and floor completely
- Wrap paper towels around the base of the tank
- Wait 30–60 minutes and inspect — if the paper is damp all over the tank surface rather than at a specific point, it is condensation
How to fix it:
- Condensation on a new heater is normal — it will stop once the water temperature stabilizes
- For persistent condensation, improve ventilation around the water heater
- Insulate the cold water inlet pipe to reduce temperature differential
- If condensation is severe and ongoing, check that the thermostat is set correctly — a tank that never heats fully will always produce condensation
Cost: $0–$10 | Time: Ongoing monitoring
Cause 5: Tank Corrosion — The Most Serious Cause
If the leak is coming from the tank body itself — from the seam, the base, or through a pinhole in the steel — the tank has corroded through internally. This is the most serious cause of a water heater leaking from the bottom, and unfortunately it cannot be repaired.

Signs of tank corrosion:
- Water seeps from the tank body — not from any fitting, valve, or element port
- The water is rusty or discolored
- The tank is over 10 years old
- You can see rust or dark staining on the exterior of the tank at the leak point
- You have already checked and ruled out all fittings and valves as the source
What to do:
A corroded tank cannot be repaired — replacement is the only option.
- Turn off the cold water supply immediately
- Set gas to PILOT or turn off the electric breaker
- Connect a garden hose to the drain valve and drain the tank to prevent further water damage
- Contact a licensed plumber to install a replacement water heater
- While waiting, place buckets and towels to contain water
Replacement cost guide:
| Water Heater Type | Unit Cost | Installation | Total |
|---|---|---|---|
| Gas tank (40 gal) | $400–$700 | $150–$300 | $550–$1,000 |
| Electric tank (40 gal) | $300–$600 | $100–$250 | $400–$850 |
| Tankless gas | $500–$1,500 | $300–$500 | $800–$2,000 |
Cost: $400–$2,000 | Time: Professional installation required
Quick Reference: Water Heater Leaking from the Bottom
| Cause | Source of Leak | Fixable? | Cost |
|---|---|---|---|
| Leaking drain valve | Drain valve spout | ✅ Yes | $0–$20 |
| T&P discharge pipe dripping | End of pipe at floor | ✅ Yes | $15–$30 |
| Failed element gasket | Element port (electric only) | ✅ Yes | $10–$20 |
| Condensation | Tank exterior surface | ✅ Not a real leak | $0–$10 |
| Tank corrosion | Tank body or seam | ❌ Replace | $400–$2,000 |
How to Tell If the Tank Has Failed
Use this simple test to confirm whether the tank body is the source of the leak before calling a plumber:
- Dry the entire tank and floor completely
- Tighten all visible fittings — drain valve, T&P valve, element ports
- Place separate paper towels around each fitting and one flat paper towel under the tank center
- Wait 60 minutes
- Check each paper towel:
- Wet at a specific fitting → that fitting is the source, not the tank
- Wet under the tank center with no fitting nearby → the tank body is leaking
Prevention Tips
- Drain and flush the tank every 6–12 months to remove sediment — sediment accelerates corrosion
- Replace the anode rod every 3–5 years — it protects the tank from internal corrosion
- Test the T&P valve annually — lift the lever briefly and confirm it seals completely
- Install a drip pan under the water heater — catches leaks before they cause floor damage
- Replace a water heater over 10 years old proactively — before it fails and causes a flood
When to Call a Professional
Call a licensed plumber immediately if:
- The tank body itself is leaking — replacement cannot wait
- The T&P valve is releasing due to dangerously high pressure
- You are not comfortable draining and working on the water heater
- There is significant water damage to surrounding walls or flooring
- Your water heater is still under warranty
Final Thoughts
A water heater leaking from the bottom is either a simple drain valve issue — free to fix in 15 minutes — or a failed tank that needs full replacement. The most important step is identifying exactly where the water is coming from before spending money on repairs. Use the paper towel test to confirm the source, fix what is fixable, and replace the tank if corrosion has reached the tank body.
Did this guide help you diagnose your water heater leaking from the bottom? Leave a comment and tell us what the cause was and what you decided to do!
Leave a Reply