
Last Updated: June 2026 | Reading Time: 8 minutes
Knowing how to clean a dryer vent is one of the most important home safety skills you can have — yet most homeowners have never done it. A clogged dryer vent is the leading cause of dryer fires, responsible for approximately 16,000 house fires every year in the United States alone. It also causes your dryer to take much longer to dry clothes and dramatically increases your energy bills.
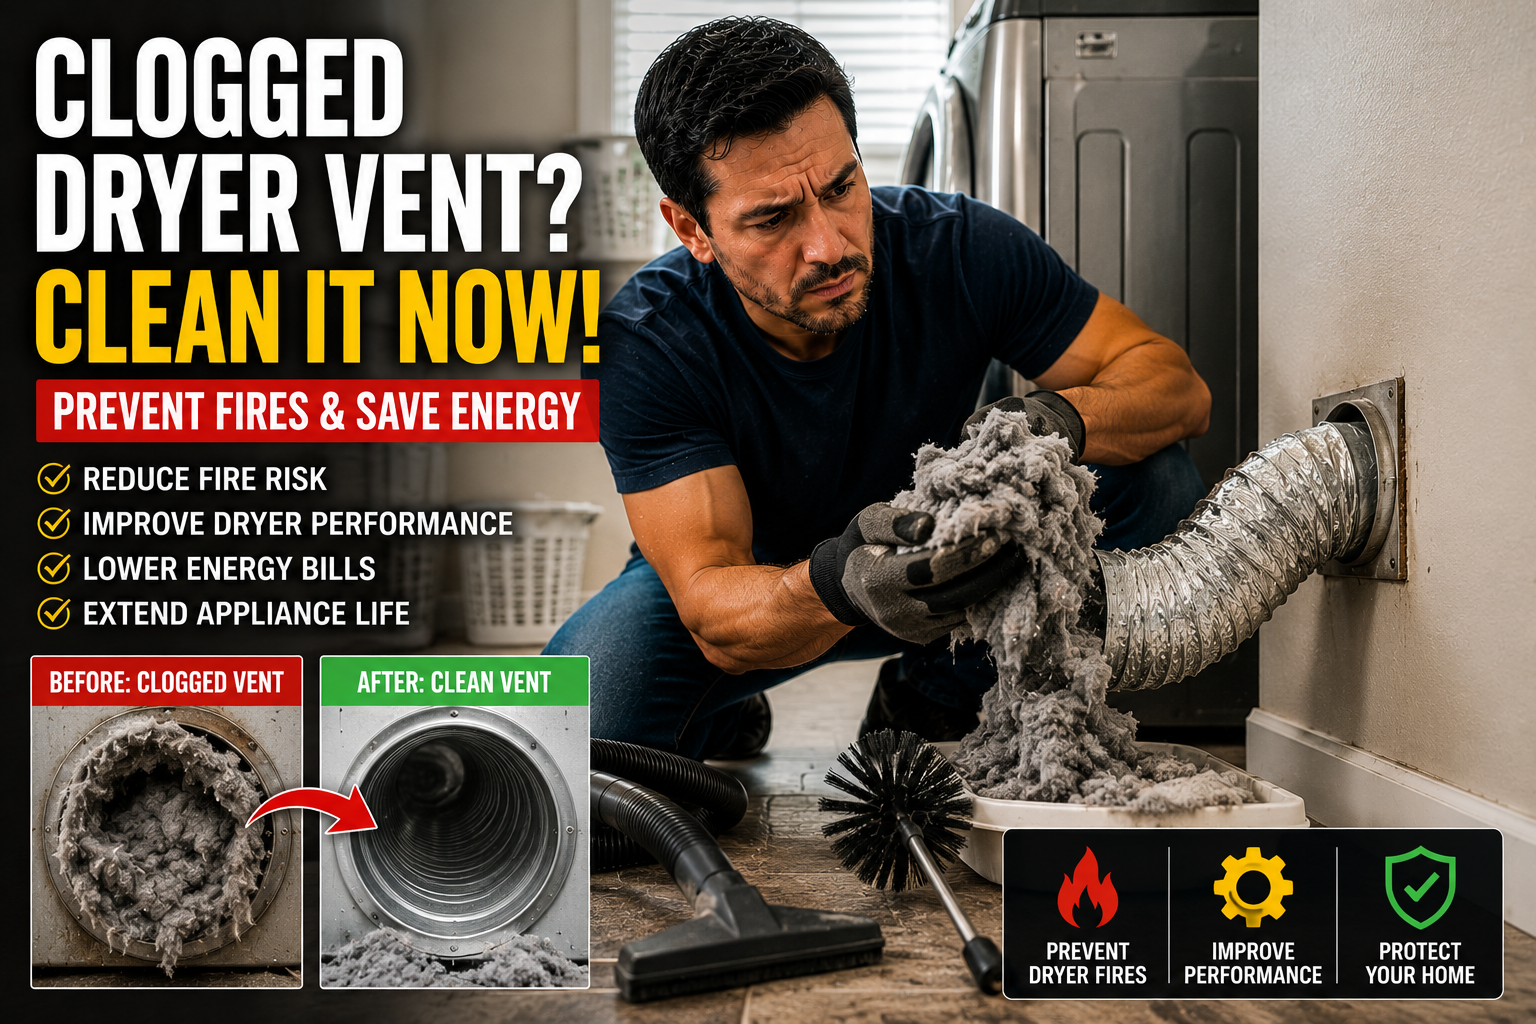
In this guide, we’ll show you exactly how to clean a dryer vent step by step, what tools you need, how often to do it, and the warning signs that tell you it needs cleaning right now.
Why Cleaning Your Dryer Vent Is So Important
Most homeowners clean the lint trap regularly — but very few ever clean the exhaust vent. Here is why that matters:
Fire safety:
- Lint is highly flammable — more flammable than paper
- A clogged vent traps hot, moist air inside the dryer
- Temperature builds until the lint inside the vent ignites
- According to the U.S. Fire Administration, failure to clean dryer vents is the leading cause of dryer fires
Energy efficiency:
- A clogged vent forces the dryer to run longer to dry the same load
- A severely clogged vent can double or triple drying time
- This can add $100–$300 per year to your electricity or gas bill
Appliance lifespan:
- A dryer that cannot exhaust properly overheats during every cycle
- This accelerates wear on the heating element, thermostats, and motor
- Regular vent cleaning extends dryer lifespan by years
Signs Your Dryer Vent Needs Cleaning Right Now
Do not wait for your annual cleaning schedule if you notice any of these warning signs:
- Clothes take more than one cycle to dry a normal load
- The outside of the dryer feels very hot during operation
- Clothes feel extremely hot at the end of a cycle
- You notice a burning or musty smell during the cycle
- The exterior vent flap does not open or only opens partially
- It has been over 12 months since the vent was last cleaned
- You have multiple people in the household doing laundry daily
What You Need to Clean a Dryer Vent
You do not need expensive equipment — just basic tools:
- Dryer vent cleaning brush kit ($15–$25 on Amazon) — a long flexible brush with extension rods that connect together to reach the full vent length
- Vacuum cleaner with narrow crevice attachment
- Screwdriver (to disconnect the duct clamp if needed)
- Work gloves (optional but helpful)
- Flashlight (to inspect inside the duct)
For longer duct runs (over 15 feet), a drill-powered vent cleaning brush kit ($25–$40) makes the job much easier and more thorough.
How to Clean a Dryer Vent — Step by Step
Step 1: Locate Your Dryer Vent System

Your dryer vent system has three parts:
- The exhaust port at the back of the dryer
- The duct that runs through your wall or ceiling
- The exterior vent cap on the outside of your home
Before cleaning, trace the duct path so you know the route it takes and where the exterior vent is located — you will need access to both ends.
Step 2: Unplug the Dryer and Pull It Away From the Wall
- Unplug the dryer from the wall outlet
- If it is a gas dryer, turn off the gas supply valve
- Carefully pull the dryer 2–3 feet away from the wall — get a helper if the dryer is very heavy
- Be careful not to kink or tear the flexible duct as you move the dryer

Step 3: Disconnect the Duct From the Dryer
- Locate where the flexible duct connects to the exhaust port at the back of the dryer
- Remove the metal clamp or foil tape holding the duct in place — use a screwdriver if needed
- Gently pull the duct away from the dryer’s exhaust port
- Set the clamp aside — you will need it for reassembly

Step 4: Vacuum the Dryer’s Exhaust Port
Before working on the duct, clean the exhaust port on the dryer itself:
- Use a vacuum with a narrow crevice attachment
- Insert it into the dryer’s exhaust port and vacuum out any accumulated lint
- Use a flashlight to check how far the lint extends — remove as much as possible with the vacuum

Step 5: Clean the Duct From the Dryer End
- Assemble your dryer vent cleaning brush kit — connect enough extension rods to reach the full length of your duct
- Insert the brush into the duct opening at the back of the dryer
- Push the brush through the duct with a gentle rotating motion — this loosens lint from the duct walls
- Work the brush back and forth through the entire duct length
- Lint will fall into the duct or be pushed toward the exterior vent
- Vacuum out any lint that has fallen near the dryer end of the duct

Step 6: Clean the Exterior Vent From the Outside
- Go outside and locate the exterior vent cap — usually a louvered or flap-style vent on the exterior wall of your home
- Remove any visible lint from the vent cap opening — you may be surprised how much has accumulated
- Check that the flap opens and closes freely — replace it if it is stuck, damaged, or corroded ($10–$20)
- Insert the cleaning brush into the exterior vent opening and work it back through the duct
- This two-direction approach ensures the entire duct is thoroughly cleaned

Step 7: Vacuum the Entire Duct Thoroughly
- Use the vacuum with the crevice attachment to vacuum out all loosened lint from both ends of the duct
- Use a flashlight to inspect inside the duct from both ends — you should be able to see daylight through a short duct
- If you cannot see through or if there is still significant lint visible, repeat the brush cleaning

Step 8: Inspect the Duct for Damage
While the duct is disconnected, this is the perfect time to inspect its condition:
- Check for kinks, crushing, or holes in the flexible duct
- Look for disconnected joints or separated sections
- If you find any damage, replace the affected section — flexible metal duct costs $10–$20 per section
- Replace any flexible plastic or foil duct with rigid or semi-rigid metal duct — plastic and foil are fire hazards and are not approved in most building codes

Step 9: Reconnect and Push the Dryer Back
- Reconnect the duct to the dryer’s exhaust port
- Secure the connection with a metal clamp — never use regular duct tape which deteriorates with heat
- Make sure the connection is airtight with no gaps
- Carefully push the dryer back toward the wall — leave at least 1 inch of clearance between the back of the dryer and the wall
- Make sure the duct does not get crushed or kinked as the dryer moves back

Step 10: Test the System
- Plug the dryer back in (and restore gas supply if applicable)
- Run a short cycle — 10–15 minutes on a medium heat setting
- Go outside and check the exterior vent — the flap should be fully open and you should feel a strong, warm airflow
- If the flap is only partially open or airflow is weak, there may still be a blockage further along the duct

Cost: $15–$40 | Total Time: 45–60 minutes
How Often Should You Clean Your Dryer Vent?
| Household Situation | Cleaning Frequency |
|---|---|
| 1–2 people, average laundry | Once a year |
| Family of 4, regular laundry | Every 6–9 months |
| Large household or daily laundry | Every 3–6 months |
| Pets in the household | Every 6 months |
| Duct run over 15 feet | Every 6 months |
| Commercial or heavy use | Every 3 months |
Types of Dryer Duct — Which Is Safest?
| Duct Type | Safety | Airflow | Recommendation |
|---|---|---|---|
| Rigid metal duct | ✅ Best | ✅ Best | Recommended for all installations |
| Semi-rigid metal duct | ✅ Good | ✅ Good | Good alternative where rigid is difficult |
| Flexible foil duct | ⚠️ Fire hazard | ❌ Poor | Replace immediately |
| Flexible plastic duct | ❌ Fire hazard | ❌ Poor | Replace immediately |
If your dryer is connected with flexible plastic or foil ducting, replace it with rigid or semi-rigid metal duct as soon as possible — these materials are not approved for dryer exhaust in most building codes and significantly increase the risk of a dryer fire.
Quick Reference: How to Clean a Dryer Vent
| Step | Action | Time |
|---|---|---|
| 1 | Locate the vent system | 2 minutes |
| 2 | Unplug dryer and pull from wall | 3 minutes |
| 3 | Disconnect the duct | 3 minutes |
| 4 | Vacuum the exhaust port | 5 minutes |
| 5 | Brush clean from inside | 10 minutes |
| 6 | Clean exterior vent from outside | 10 minutes |
| 7 | Vacuum entire duct | 5 minutes |
| 8 | Inspect duct for damage | 5 minutes |
| 9 | Reconnect and push dryer back | 5 minutes |
| 10 | Test the system | 10 minutes |
| Total | ~60 minutes |
Prevention Tips
- Clean the lint trap before every single load
- Schedule annual dryer vent cleaning on the same date every year — set a recurring calendar reminder
- Never use flexible plastic or foil ducting — replace with rigid metal
- Keep the area around the exterior vent clear of plants, snow, and debris
- Never run the dryer while sleeping or away from home
- Install a smoke detector near the laundry room
When to Call a Professional
Consider hiring a professional vent cleaning service if:
- Your duct run is very long (over 25 feet) or has multiple bends
- The duct runs through the ceiling or walls and is difficult to access
- You find significant damage to the duct during inspection
- After DIY cleaning, airflow at the exterior vent is still weak
- You want an annual inspection combined with cleaning
Professional dryer vent cleaning services typically cost $80–$150 and include a full inspection of the duct system.
For more information on dryer fire safety, visit the U.S. Fire Administration.
Final Thoughts
Knowing how to clean a dryer vent is one of the most important home safety skills you can have. The job takes about an hour, costs under $25 in tools, and needs to be done just once a year — yet it protects your home from fire, cuts your energy bills, and extends the life of your dryer. If you have never cleaned your dryer vent, stop reading and do it today.
Did cleaning your dryer vent make a noticeable difference in drying time? Leave a comment and tell us how much lint you found and how long the job took!
Leave a Reply